A couple of weeks after the first online workshop , we met again with the Year 3 teachers and children at Ryelands Primary school for a series of three remote workshops and one field trip which constituted the core of our pilot project.
The purpose of the project was to explore with children and teacher how might we design visualisation tools and practices to help us notice the presence and diversity of plant life in everyday urban environments. To do so, we designed the Biodiversity Logbooks which include tools for collecting, studying, and visualising plants (including, as we will see later, an exciting kit to make cyanotypes) as well as a set of instructions to replicate the experience at home. We prepared 50 logbook kits (one for each student and teacher), all ready to be used during our field trip. But in working with the teachers to design and plan the activities, we learnt the importance of helping children to develop a basic understanding of plant structures and types as well as an appropriate vocabulary, so that they would have some idea of what to look for when out in the field as well as the confidence to describe the plants and their habitat.
For this reason, we started the workshop series with one preliminary activity that we ran remotely with children and teachers in their classrooms. This activity focussed specifically on building and reinforcing key concepts and terms. Using our guidance and working with props that we prepared and delivered in advance to the school, students learnt about different plant structures, leaf types, leaf arrangements, and plant families. We used diagrams, illustrations, sorting and matching activities, and the teachers improvised useful mnemonics to help the children remember different types of plants and leaves. In a following workshop we also talked about how to map plants in relation to their environment and built digital compasses using micro:bits.
On the day of the field trip, we met with two very excited classes of children ready to explore the nature in their school’s neighbourhood – with logbooks and digital compasses in hand!
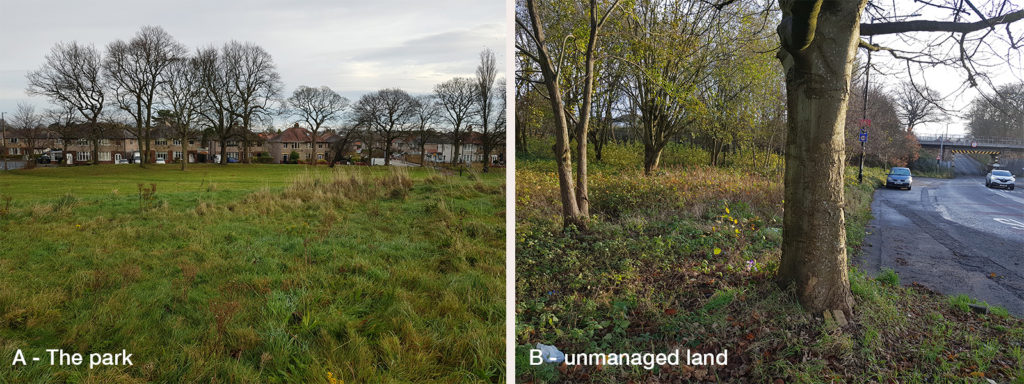
We chose to explore two different areas: a local park (A) and a pocket of unmanaged land (B) wedged between the rail tracks and a busy road. These two starkly different environments showed us how different plants thrive in different conditions: Grass and open spaces are prevalent in the park, where we could find mostly sturdy plants with thick stems and large leaves that can withstand wind and benefit from direct sunlight. The unmanaged area, which is surrounded by trees providing shade and shelter from wind, was instead rich in smaller, more delicate plants, as well as plants that need less direct sunlight. We used the logbooks to record our impression of the environments, and the compass to reflect on the orientation and position of the plants in relation to the site. We tried to focus on what a plant might feel and experience, and why do certain plants prefer certain places. By doing so, we also reflected on humans and plants might prefer different environments: the pocket of green next to the road looked unpleasant to most of us, but that’s where we found a greater biodiversity and richness in plant life.

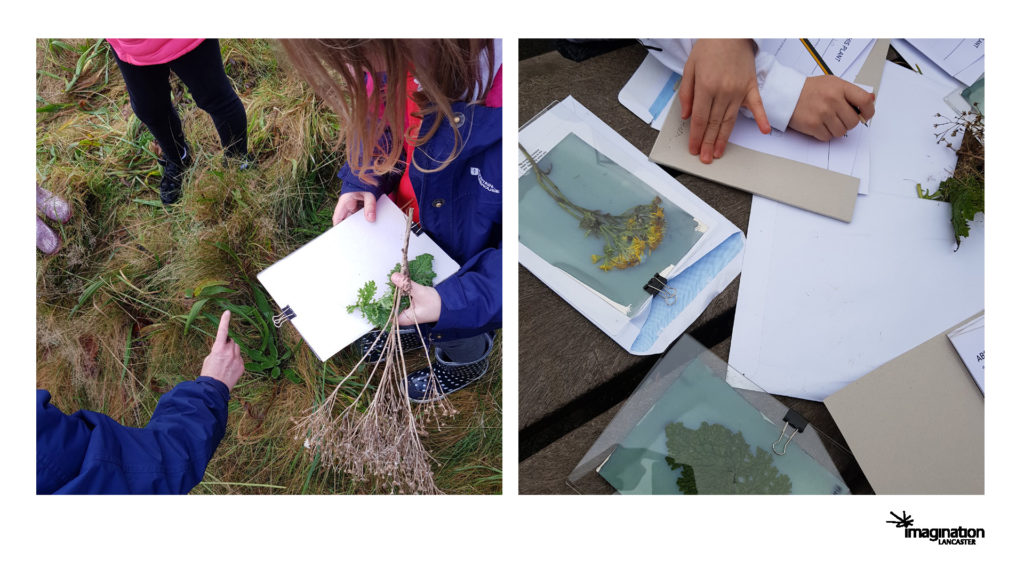
When out in the field, we collected samples of plants that we found interesting. Using the vocabulary learnt in class, children were particularly excited about looking for different leaf structures or arrangements, and tried to spot the less common ones. In the middle of all the excitement, it became increasingly difficult to stay focussed on the plants that we collected instead of running around to find more. This told us that it was time to move on to our next activity: using the cyanotypes to slow down and look more closely.
A cyanotype is a a photographic impression made with paper that is treated with a photosensitive solution which turns blue when exposed to sunlight. The process takes anywhere between 5 and 30 minutes (depending on weather conditions) and generates a permanent impression – which means that it is very important to carefully plan how to arrange the sample ahead of starting the impression process. In our project, we used the process of making cyanotypes as a slow visualisation technique that required children to observe their plant closely, understand its structure and how to show it in the print, and patiently wait for the impressions to happen.

On a cloudy November day, children waited about half an hour for the paper to turn blue. During this time, we looked more closely at the plants that we collected, and used the plant study sheets in the Biodiversity Logbooks kits to describe their key features. We also compared samples, and noticed the differences between the plants that we found. Children were then asked to make a drawing of the plant that they collected.
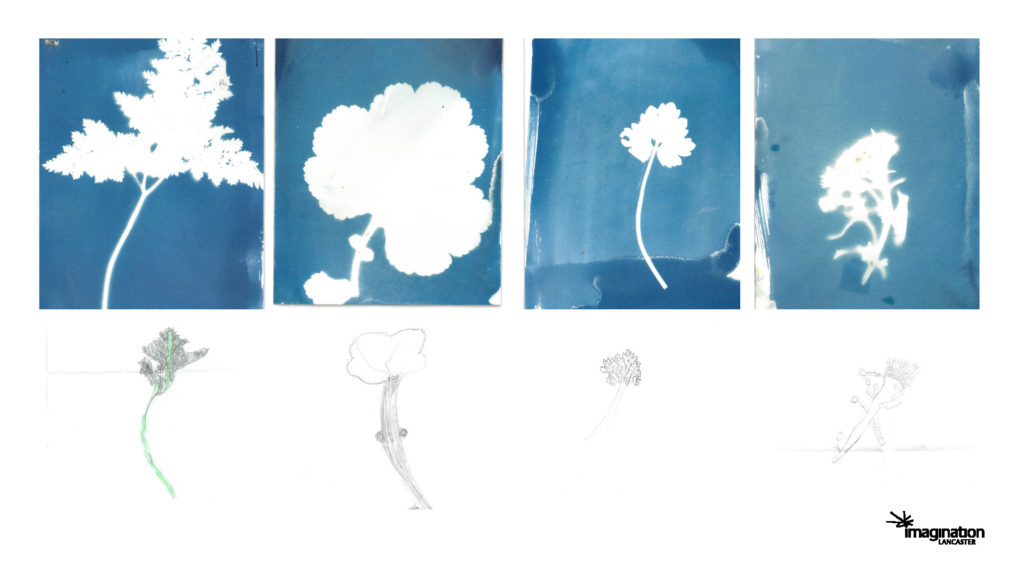
You can see some of the drawing below, each one of them below the cyanotype that was made during the day. The drawings made at the end of this activity show how the children’s noticing skills have developed throughout the process. We have been comparing these drawings to the ones that were done on our first visit and we could see an increased attention to details in the drawings. This suggested to us that the slow visualisation processes that we used to represent and study our samples played an important role in developing key noticing skills. A few weeks after the field trip, we had a meeting with the teachers, who told us that the idea of “noticing” was really embraced by the students, who adopted it also when approaching other subjects.

So, what’s next? we are now getting ready to go back to Ryelands and other schools in the Spring/Summer for a new set of workshops. These will include a mapping activity so that at the end of the project we will be able to co-create a map of local biodiversity starting from the data collected by the students.
A big thank you to the head teacher and the Year 3 teachers at Rylands primary school in Lancaster for planning and running the activities with us, and to all the amazing students for their enthusiasm and hard work.
